I want to share what I call the bombproof way to plant a tree, based on my years of experience as a novice homesteader, as well as the expertise of the many more knowledgeable tree people that I study.
Materials You’ll Need
All right, so first of all, the materials that you’re going to need are
- a spade shovel
- cardboard
- wood chips
- compost
- tree tube
- stake
- reflective ribbon
- bucket of water
- plant label
Keep the Roots Moist and Plant at the Right Time
As you’re working on the planting, it’s a good idea to actually put your bare-root tree into the bucket of water to keep the roots moist, because if the roots dry out, that puts a lot of stress on the tree and can end up killing it.
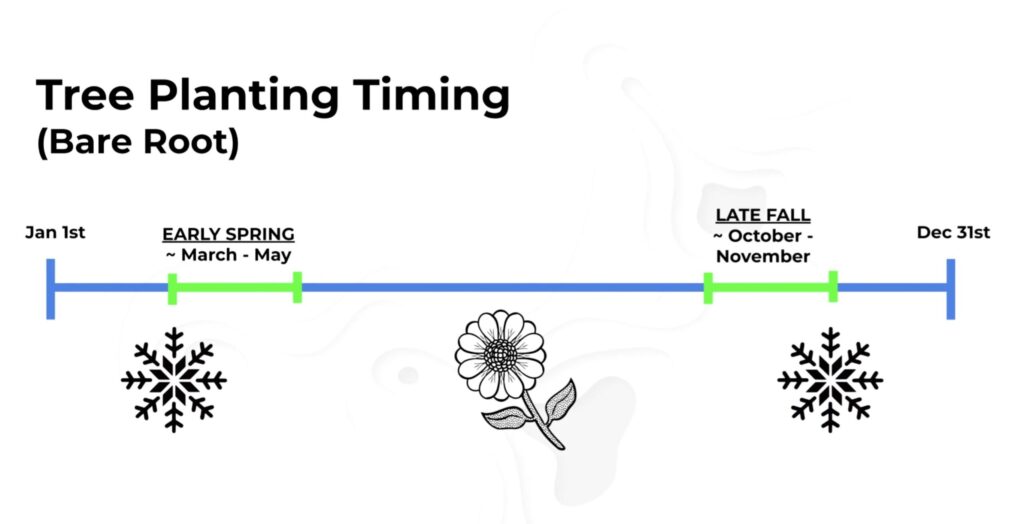
Also, as a reminder, you want to be doing this when the tree is dormant, so when it doesn’t have all its full leaves out yet. Depending on where in the world you are, that’s usually early in the spring or late fall, early winter. And that’s just because transplanting a tree puts a lot of stress on it, so it’s better to do it while the tree is kind of asleep rather than when it’s trying to pull in all sorts of water and nutrients and trying to grow.
Also, if you’re planting the tree out into its final position in an exposed location, then I don’t recommend one-year seedlings. I’ve had a much better survival rate by planting trees that are a couple years old. So they’re typically about 3 to 4 feet tall, with a trunk about the width of your pinky finger.
Digging the Hole Properly
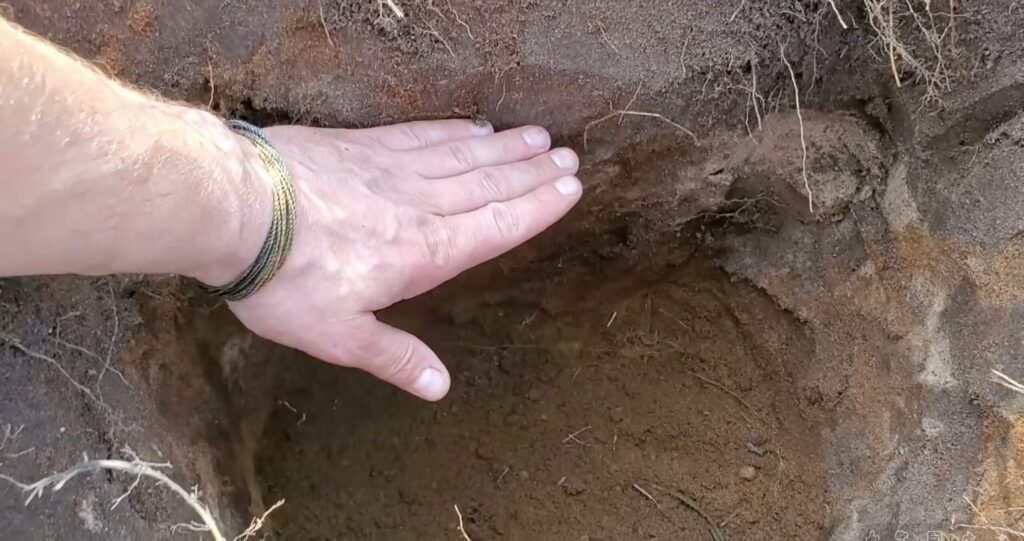
So, the first thing to do is dig a hole. And a good tip, as you’re digging, is to have some sort of layer to collect the dirt on so that it doesn’t mix in, because usually there’s going to be vegetation up here. I’ve used plywood or a tarp.
Then you’ll notice that there are two different layers. There’s the darker topsoil layer, which has a lot of the organic matter and living biology in it, and then there’s the lighter subsoil. Generally, you want to keep those separate. Also, there are going to be clods of sod, because eventually, when you return them back to the hole, you want to keep them in the same order. So you’re going to put the subsoil back first, then the topsoil, then we’ll talk about what to do with the sod clods.
And you want the hole to be nice and big. Generally, you’re going to have it be based on the root system of the tree that you’re planting. Step one: dig a hole, make it big.
Positioning the Roots Correctly
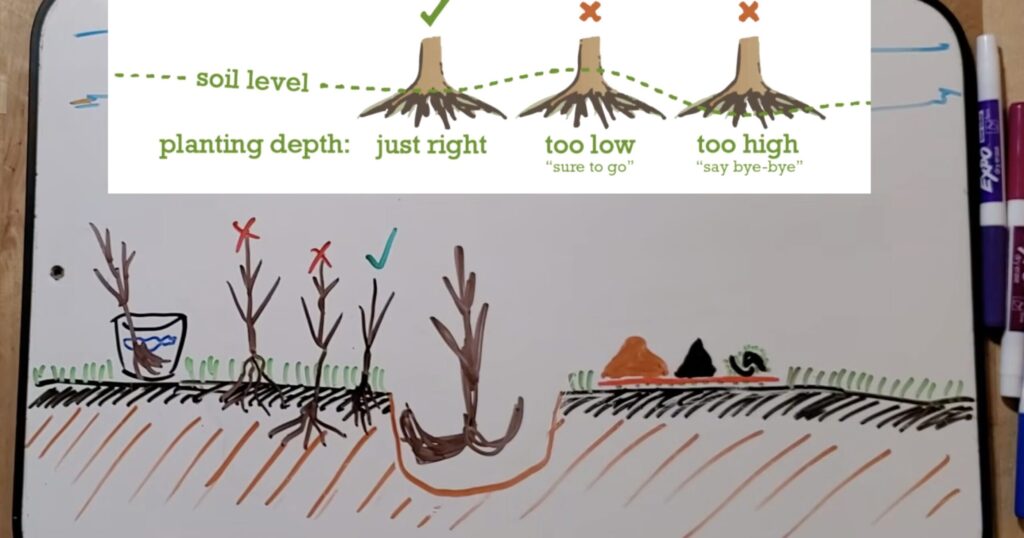
Step two: put the tree in the hole, roots down. How the roots are shaped in the planting hole is one of the main ways to kill, or at least disable, your tree.
First of all, you don’t want them bending off to one side like that, or definitely curling up. That would mean the hole is too small. You don’t want to plant it too shallow, so if there are a lot of roots exposed above the ground, that’s too shallow. But also, if the roots start further down, that’s going to be too deep.
You want the crown of the roots, where it just starts to widen, to be right around soil level.
Adjusting the Hole for Your Soil
Now, a trick that I use, because I’m in really sandy, dry soil, is I actually have the planting hole end up being like a bowl. That way it can collect water that then soaks in when it rains. Because it’s sandy soil, I don’t ever have to worry about that water sticking around too long where it’s going to drown the tree. The soil soaks the water into the ground so quickly here that that’s actually beneficial.
So in drier environments, drier climates, it could be a good strategy to have the final soil level be lower than the surrounding area, so it becomes kind of a water catchment.
Backfilling and Building Healthy Soil Contact
Then you’ll start backfilling the hole with the soil. And I do it kind of like one layer at a time while holding the tree upright. If you have compost, this is a good time to mix compost into the backfill, but only like 10 to 20%. I do it because, again, my soil is really poor, nutrient-poor soil. There are some people that say if you put too much fertility in the planting hole, it discourages the roots from wanting to grow out of the planting hole and expand. That’s important to keep in mind, but I think giving a little extra boost, for me, in my poor soil, is more important to get them to just survive.
Another trick of the trade: in heavier soils, so in clay soils, sometimes the sides of the hole, as you’re shoveling, can create a really sheer, almost impermeable layer. It can kind of compact the sides of the hole, which then will make it difficult for the roots to expand outward as the tree grows. A good solution there is to use your shovel and just kind of jam it into the sides and even the bottom of the planting hole to help break that apart and make it easier for the roots to then grow out and expand.
So then, as you’re adding each layer, you’re going to tamp down or compress the backfill. You don’t want there to be a lot of air gaps, because it’s really important for those roots to have a lot of contact with the soil so that they can get their moisture and they don’t dry out, and they have access to all the different nutrients and things they need in the soil.
So, kind of doing it layer by layer: add one layer, tamp it down, add another layer while holding the tree in place, tamp that down, being careful not to break the roots. Then we move to the darker topsoil, tamping that down.
Another trick of the trade: adding beneficial mycorrhizal fungi can help the roots grow much farther than without it. So that’s a product you can buy, the mycorrhizal fungi, or do what I do and grab a little bit of topsoil from your nearby forest and mix that into the soil as you’re backfilling the hole, as kind of an inoculation of all those beneficial fungi and microbes.
Adding Protection and Mulch
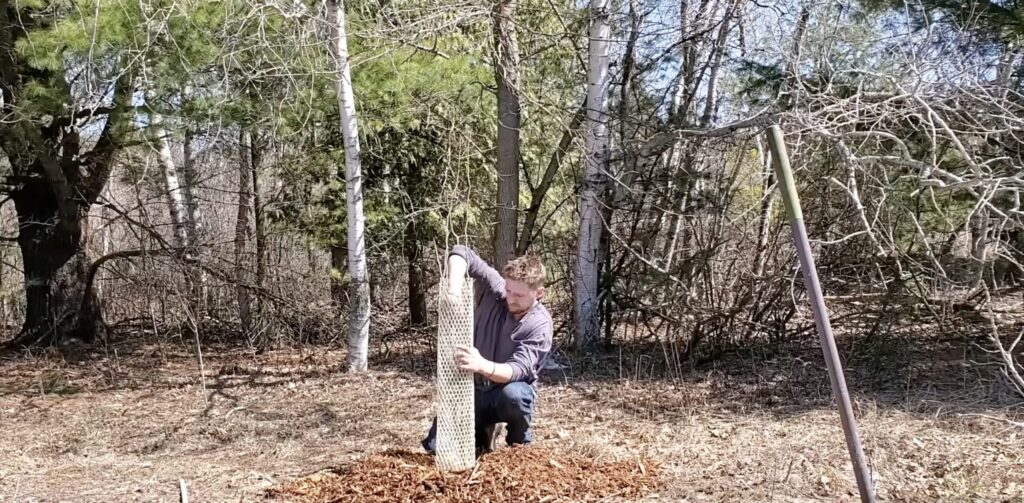
Next step is to add the tree tube. The tree tube protects the tree from damage from deer and rabbits, mostly. I like these mesh tree tubes better than the solid ones. I just feel like the plant is healthier because it can get more air. But I do double them up so they’re a little tougher, so that voles and mice can’t chew through them. Those are about a buck sixty each.
I’ve tried a lot of different stuff for the stakes. I’ve tried bamboo and wooden stakes, but they tend to rot and break off in the ground. So I tend to like something that lasts a long time and is reusable. I’ll just go to the hardware store and get half-inch Schedule 40 PVC pipe, get 10-foot sections, cut them in half so we have 5-foot stakes, and then pound those into the ground. They last a long time and are super reliable.
When you’re adding the tree tube, you’re going to have to kind of bundle up the roots, and that can be difficult to do for one person. So it is helpful if you can have another person handy there to help you.
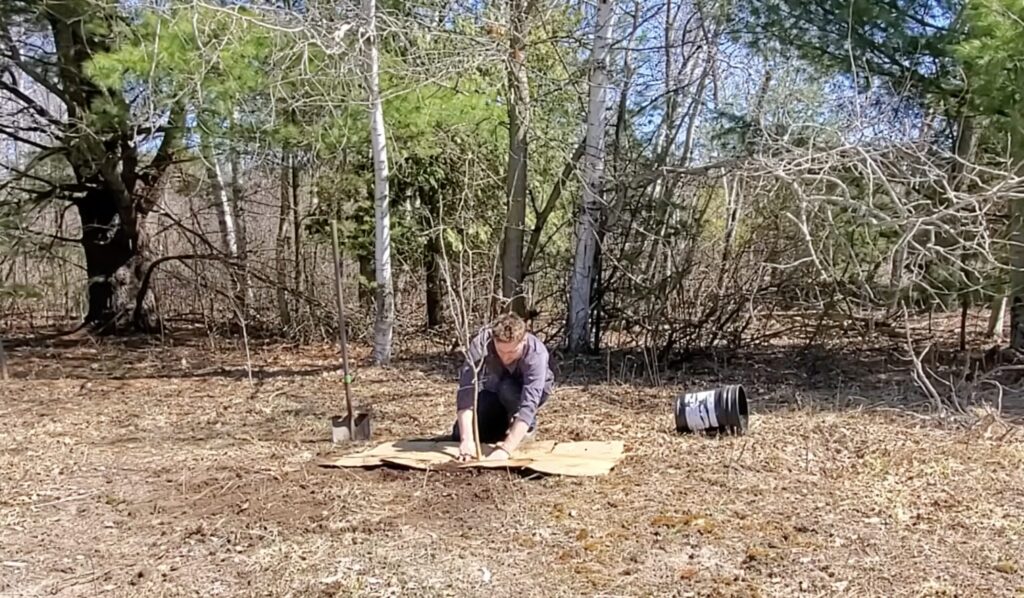
Add the stake, being careful not to damage the roots as you’re pounding that in with the hammer, and pound it quite far. You want to get it past the soil that you excavated. You want to get down into the undisturbed soil beneath so it’s really secure.
Now, remember those sod clods? I’ll sometimes use those to kind of make little mounds on either side to create that bowl. And I flip them upside down just to discourage the grass a little bit more, so the grass is on the underside.
Then you’re going to take your wet cardboard and lay it over and around the tree.
Those mesh tree tubes actually photodegrade in the sun. It’s kind of nice to know they’re not going to last for 10,000 years, but they are reusable too. Although typically I’ll leave them on the tree until they just start to break down, which would probably be about five years. Once they start to break down, I just kind of clean up the mess. I might leave the stake just so I know that that’s a tree I planted. And by then, hopefully it’s strong enough that it can deal with any kind of damage from the wildlife.
All right, next, we add the wood chips. You don’t want to have the wood chips, or the mulch, contact the trunk. And then the mulch kind of helps seal the bottom of the tree tube as well, so that rodents and things can’t get in under there.
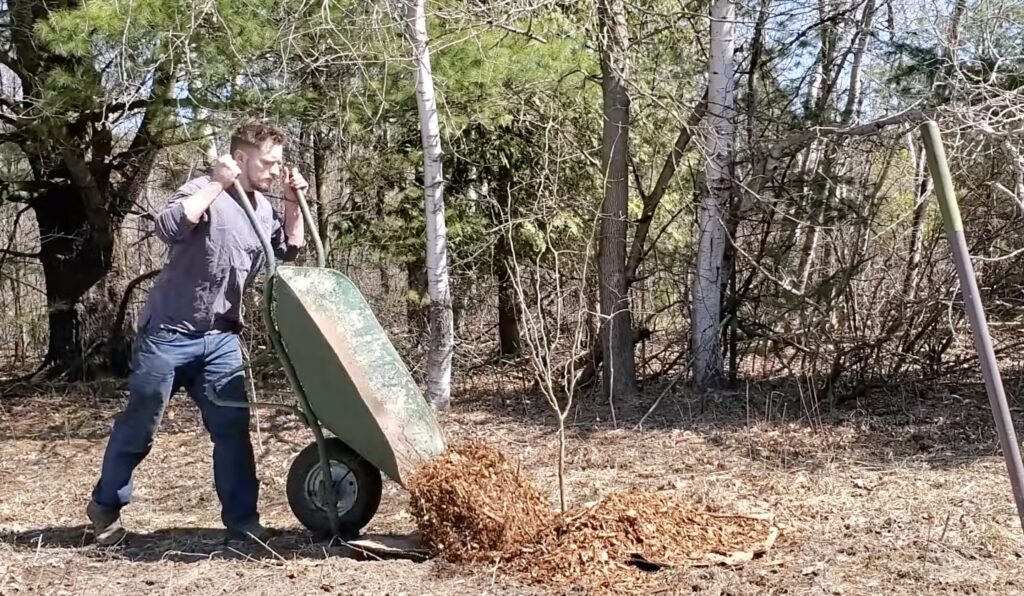
When I’m first planting a tree, I’ll easily use a full wheelbarrow of wood chips for one tree. All this stuff performs multiple different functions here for the tree. One, it’s suppressing the grass, because the grass, especially the grass roots, is very water-hungry, and that’s what the cardboard does. It helps suppress that grass or smother any grass that wants to grow back up through there. Then the mulch, the wood chips, holds in moisture and shades the soil so that any water that does get down in here isn’t likely to dry out and evaporate because the sun’s just baking on the bare soil.
In my experience, the cardboard lasts about one year. The wood chips last about two years. So then I usually go and remulch my trees. I don’t typically do the cardboard. I might do a little spot weeding around the trunk and just reapply the wood chips about every two years. But that’s going to depend heavily on climate, your environment, the soil, the grass, how aggressive everything is, all those details, and your access to wood chips.
I also like to add a little reflective ribbon. When it flaps in the wind, it kind of sparkles a lot, and that acts to deter any deer that would want to come and chomp the branches that are already growing out of the top of the tree tube.
Watering In and Ongoing Care
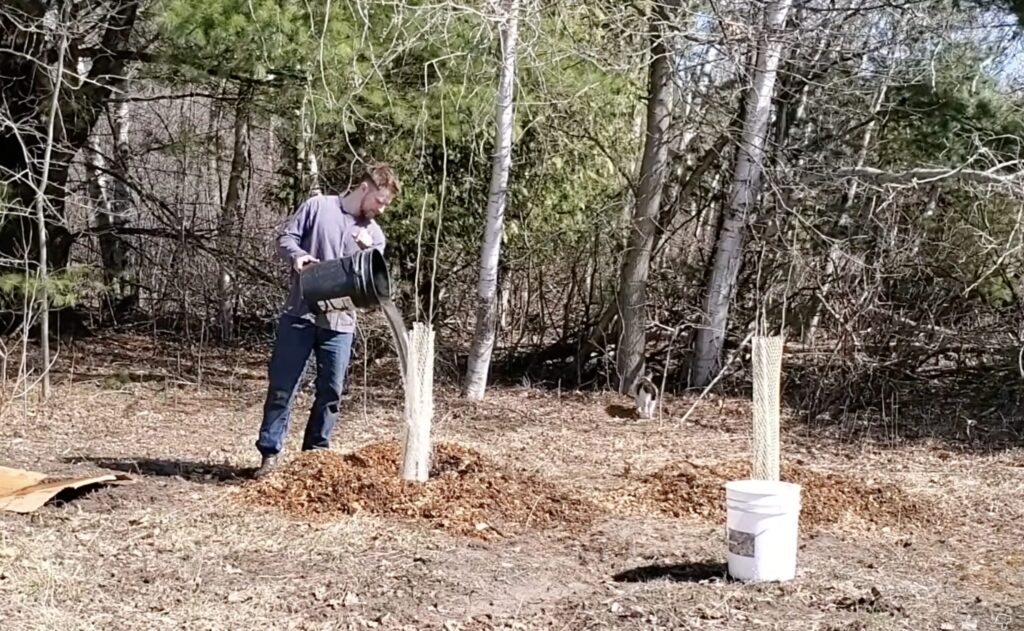
Oh, and then the most important step—don’t forget this—watering. I would add a full 5-gallon bucket per tree when you’re planting it, because it’s not just helping to water the tree and keep the roots moist, but it’s also performing the function of settling the soil. All this soil down here that you’ve kind of loosened is still going to have air pockets and stuff in there that are not good for the roots. So the water helps pick up loose particles and settle them down into all those little gaps and fills all the gaps as well.
Oh, and don’t forget to add a plant label or tag, or take notes to remember what you planted where. And then lose your notes in the following years, and then use the Seek app on your phone and cross-reference it with the nursery receipt in your email to re-identify the plant.
And don’t just plant and forget. Keep checking in, watering, observing, and noticing any issues. Maybe even throw in some encouraging pep talks, especially during its awkward teenage years.
In terms of watering, during the growing season, if I’ve noticed that we haven’t had a good rain for about a week, then I’ll go and water my trees. If you can do a full bucket per tree, that’s going to be best. But even a half bucket per tree is good.
And if you’re not doing buckets, but instead you’ve daisy-chained a bunch of garden hoses together and you’re snaking them across your land to water your trees, then I do about 30 seconds. I sometimes just put the hose right in the top of the tree tube so that the water fills right in and soaks in like that.
Wrapping Up
And that’s how you plant a tree. Do a little dance, celebrate, and then just keep repeating the process every year for the rest of your life.